
Introduction
One of the questions we’re most commonly asked is, “How do I set up my multiple monitor system?”. Well I’ve got some good news – setting up multiple monitors on Windows based PCs is remarkably fast and easy.
I’ll be providing a step-by-step guide on how to setup your monitor array in this short blog post. If you have any further questions, don’t hesitate to contact us.
Step-by-step guide
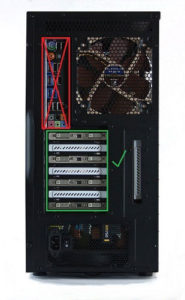
- Plug in all your monitor cables. It doesn’t particularly matter what order you plug them in. Though the top left port is often the primary monitor by default, we can easily set any screen as primary. Take extra care to match up the cable connections so as not to bend any of the pins in your cables or accidentally damage the connectors on your video card.
*Important note – if your system is configured with a discrete video card (i.e. you’re not using the on-board integrated video from your CPU/motherboard), your integrated graphics will not work correctly. Plug your video cables into your video card(s) in order to get the maximum benefit of the extra VRAM, cores, and bandwidth provided by your more powerful video card.
- Power up the system, boot into Windows.
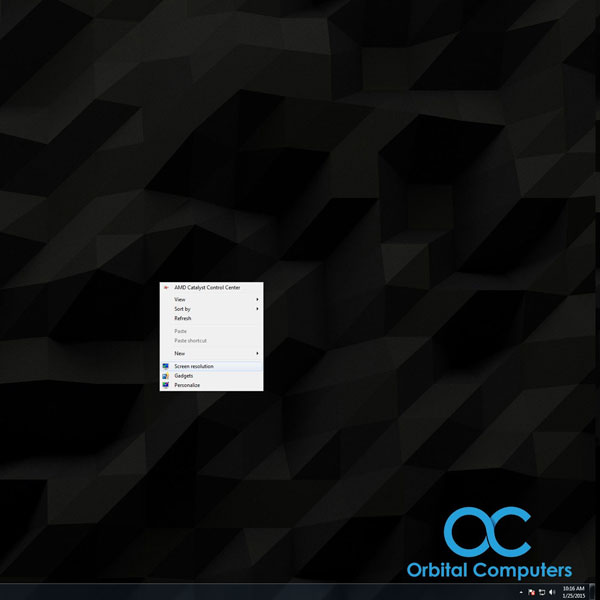
- Right click anywhere in the background and select ‘screen resolution’.
- Look at the monitor icons that come up. All of the monitors you have plugged in should be recognized. If they aren’t, try pressing the ‘Detect’ button. If they still don’t show up, you most likely have a loose video cable.
At this point, all we need to do is arrange the monitors in the proper order. We need to tell the computer what order the screens are in set up on your desk. Each monitor is numbered in this diagram and we need to click and drag the monitors in the diagram to match how they are placed in real life. - Click the ‘Identify’ button. You will see a number pop up on your screen. Look for monitor number 1 and click and drag the monitor in the diagram to match that location.
As you can see, my center monitor is number 3. So I would click and drag the monitor labeled number 3 on the diagram to the center position.
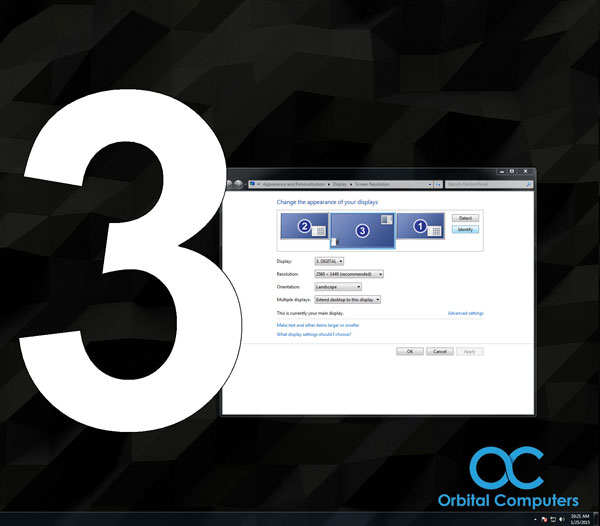
Note that you can create all sorts of interesting configurations on this diagram. It’s a very powerful tool.
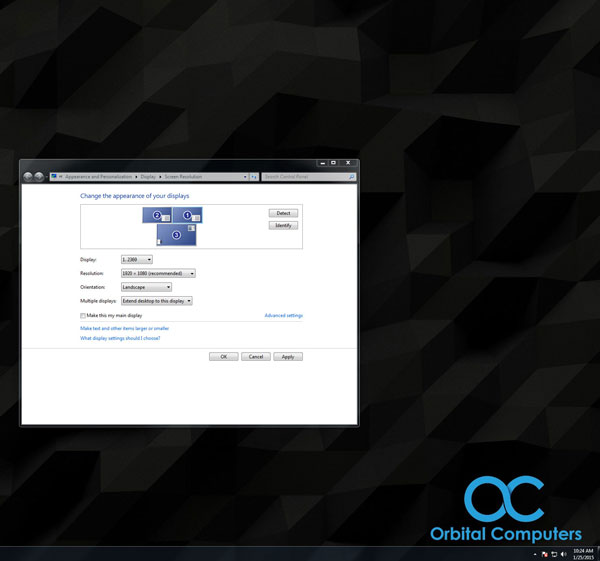
- Repeat step 5 for all your monitors until they are arranged correctly in the diagram. You may need to click the ‘Identify’ button more than once to get them arranged properly.
- The last step is to simply click ‘Apply’ and you should be all set! Try moving your mouse around all your screens and see if they are ordered correctly. If the mouse doesn’t move as you’d expect, open up the ‘screen resolution’ page again and click ‘Identify’ once more. Double check to make sure the order of the screens in the diagram is the same as they are placed on your desk.